-
Table of Contents
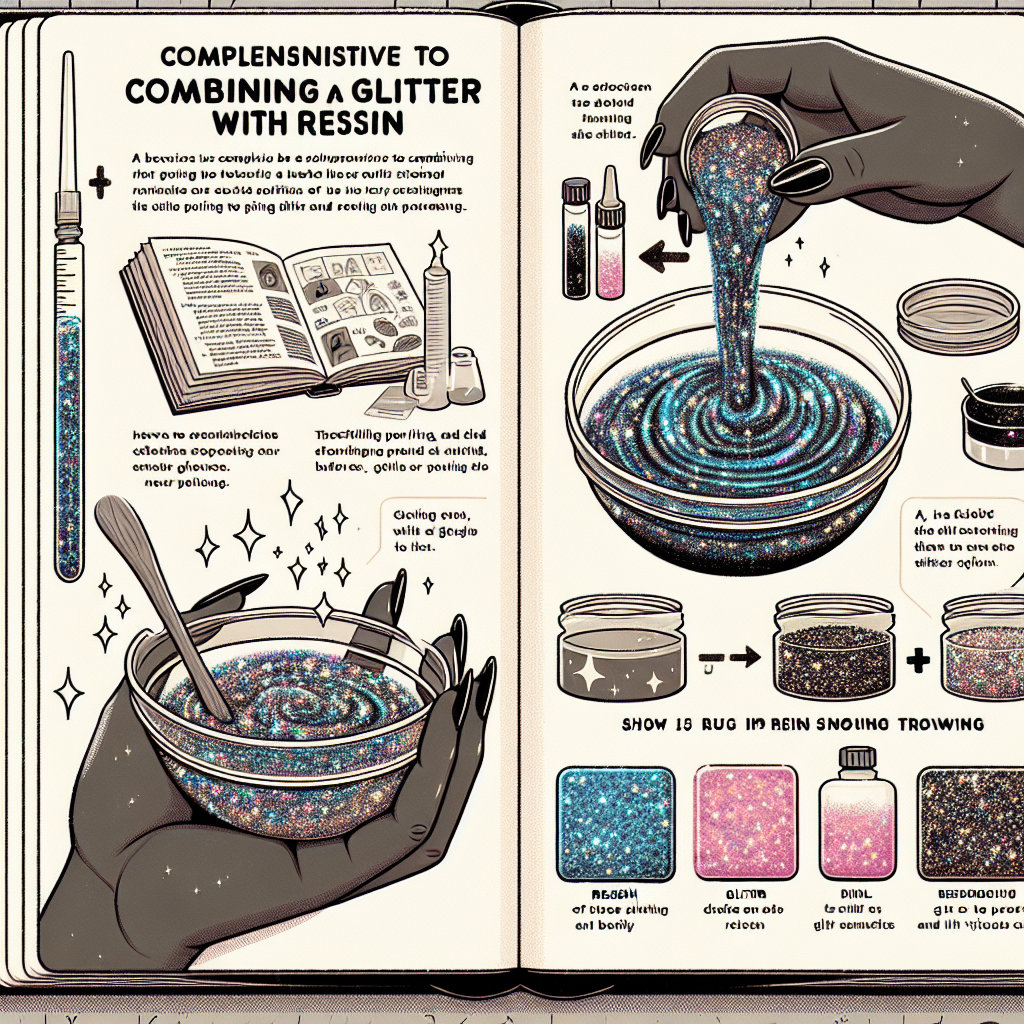
“Sparkle and Shine: Master the Art of Mixing Glitter with Resin!”
The Ultimate Guide to Mixing Glitter with Resin is your comprehensive resource for creating stunning, shimmering resin projects. This guide delves into the essential techniques, tips, and tricks for seamlessly incorporating glitter into resin, ensuring a flawless finish every time. Whether you’re a beginner or an experienced crafter, you’ll discover the best types of glitter to use, the ideal mixing ratios, and expert advice on achieving the perfect sparkle. From coasters to jewelry, this guide will inspire your creativity and elevate your resin art to new heights.
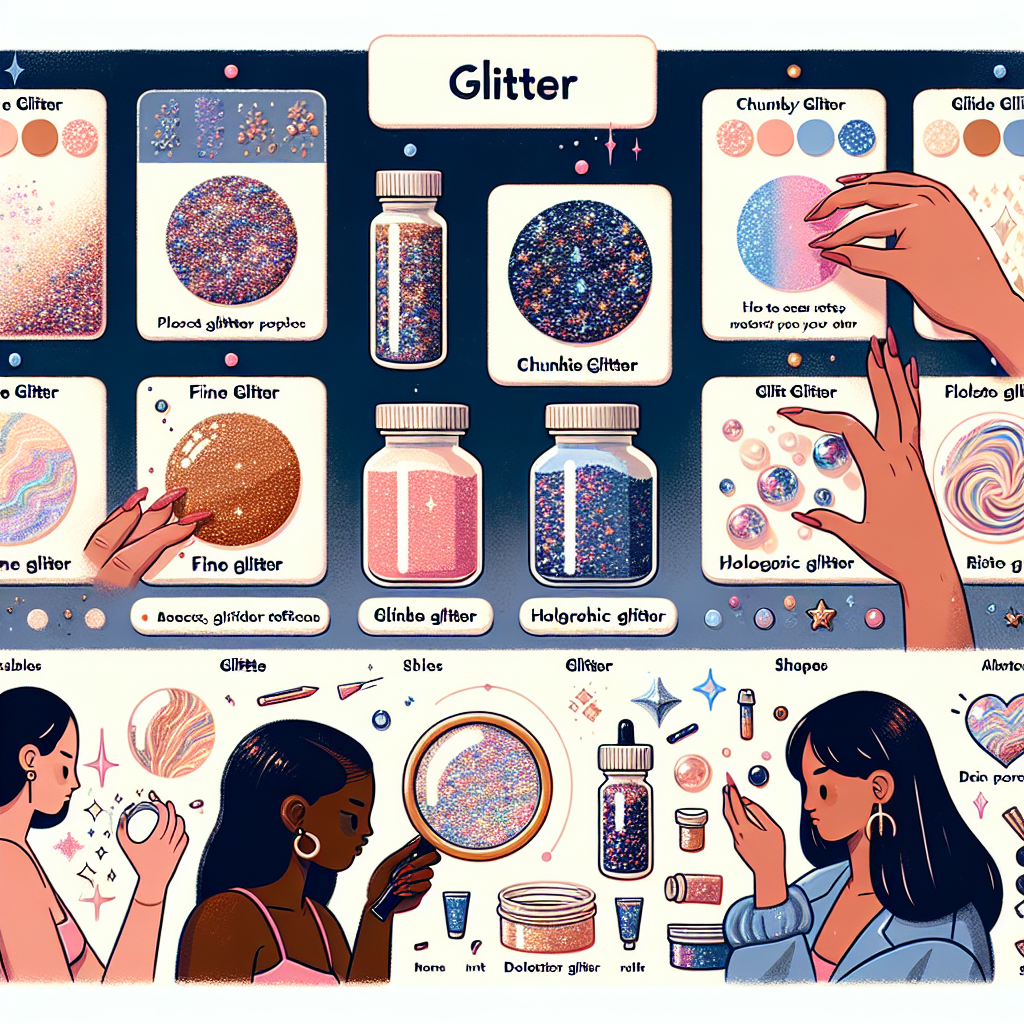
Choosing the Right Type of Glitter for Resin Projects
When embarking on resin projects that incorporate glitter, the selection of the right type of glitter is paramount to achieving the desired aesthetic and functional outcomes. The vast array of glitter options available can be overwhelming, yet understanding the characteristics of different types can significantly enhance the quality of your work. To begin with, it is essential to consider the size of the glitter particles. Glitter typically comes in various sizes, ranging from ultra-fine to chunky. Ultra-fine glitter, with its minuscule particles, tends to create a smooth, shimmering effect that is ideal for projects where a subtle sparkle is desired. Conversely, chunky glitter can add a bold, dramatic flair, making it suitable for statement pieces or projects that require a more textured appearance.
In addition to particle size, the material composition of the glitter plays a crucial role in its compatibility with resin. Most commonly, glitter is made from plastic, but there are also options made from metal or glass. Plastic glitter is lightweight and often more affordable, making it a popular choice for many resin artists. However, it is important to ensure that the plastic glitter is of high quality, as lower-grade options may fade or lose their luster over time. On the other hand, metal and glass glitters can provide a more sophisticated look and are less likely to fade, but they may also add weight to the final product, which is a consideration for certain applications.
Moreover, the color and finish of the glitter should not be overlooked. Glitter is available in a myriad of colors, including iridescent, holographic, and metallic finishes. Iridescent glitter reflects light in various colors, creating a dynamic visual effect that can enhance the depth of the resin. Holographic glitter, with its rainbow-like sheen, can add a unique touch to your projects, while metallic glitter offers a classic, elegant appearance. When selecting colors, it is advisable to consider the overall color scheme of your resin project, as well as how the glitter will interact with the resin itself. For instance, lighter glitters may become more pronounced against darker resins, while darker glitters can create a more subdued effect in lighter resins.
Furthermore, it is essential to consider the intended use of the finished product when choosing glitter. For items that will be exposed to outdoor elements or frequent handling, opting for high-quality, UV-resistant glitter can help maintain the vibrancy and integrity of the piece over time. Additionally, if the project involves food-safe applications, it is crucial to select glitter that is specifically labeled as non-toxic and safe for such uses. This attention to detail ensures that the final product is not only visually appealing but also safe for its intended purpose.
In conclusion, the process of choosing the right type of glitter for resin projects involves careful consideration of particle size, material composition, color, finish, and intended use. By taking the time to evaluate these factors, artists can enhance the overall quality and aesthetic of their resin creations. Ultimately, the right glitter can transform a simple resin piece into a stunning work of art, making the selection process an integral part of any successful resin project.
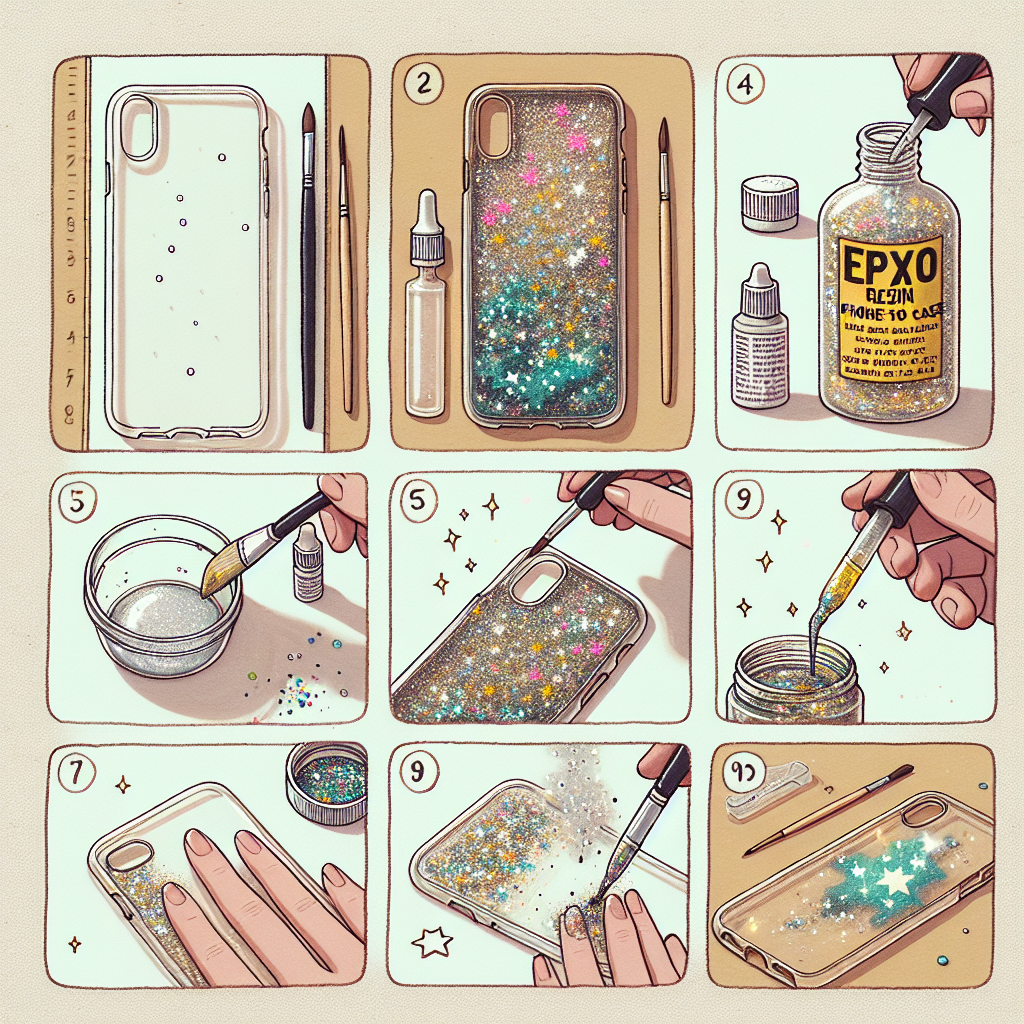
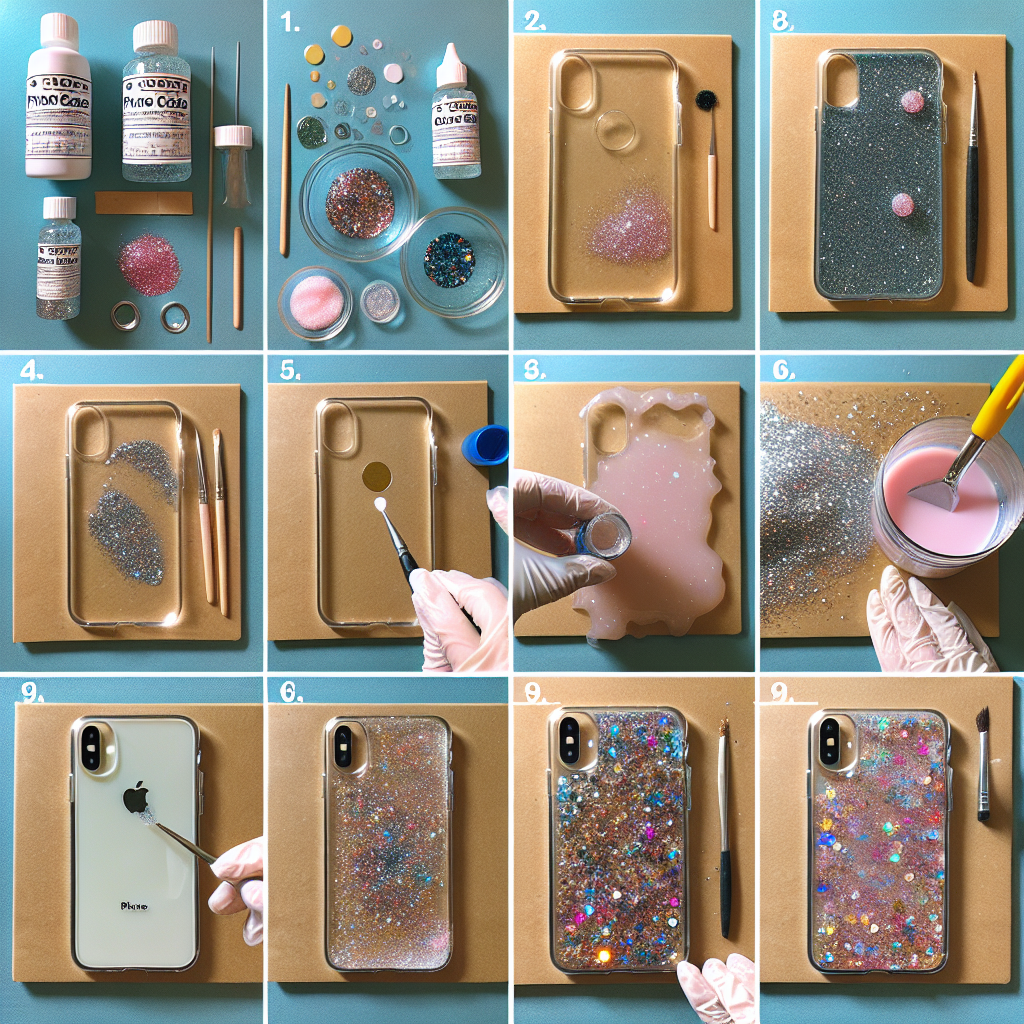
Step-by-Step Process for Mixing Glitter with Resin
Mixing glitter with resin is a popular technique that can elevate various projects, from jewelry to home decor. To achieve a stunning finish, it is essential to follow a systematic approach that ensures the glitter is evenly distributed and the resin cures properly. The process begins with gathering all necessary materials, which include epoxy resin, hardener, glitter, mixing cups, stirring sticks, and protective gear such as gloves and a mask. Ensuring that you have everything at hand will streamline the process and minimize interruptions.
Once you have assembled your materials, the next step is to prepare your workspace. It is crucial to work in a well-ventilated area, as the fumes from resin can be potent. Cover your work surface with a plastic sheet or newspaper to protect it from spills. After setting up your workspace, you can begin measuring the resin and hardener. It is vital to follow the manufacturer’s instructions regarding the mixing ratio, as this will affect the curing process and the final outcome. Typically, the ratio is either 1:1 or 2:1, depending on the specific product you are using.
After measuring the resin and hardener, pour them into a mixing cup. Using a stirring stick, mix the two components thoroughly for at least three to five minutes. It is important to scrape the sides and bottom of the cup to ensure that the resin and hardener are fully combined. This step is critical, as incomplete mixing can lead to a sticky or improperly cured finish. Once the mixture is clear and free of bubbles, you can proceed to add the glitter.
When selecting glitter, consider the size and color, as these factors will influence the final appearance of your project. Fine glitter will create a more subtle shimmer, while larger flakes will provide a more dramatic effect. As you add the glitter to the resin mixture, it is advisable to start with a small amount and gradually increase it to achieve your desired look. Stir the mixture gently to avoid introducing too many air bubbles, which can mar the surface of your finished piece.
After incorporating the glitter, it is essential to let the mixture sit for a few minutes. This resting period allows any air bubbles to rise to the surface, making it easier to eliminate them before pouring. To remove bubbles, you can gently tap the sides of the mixing cup or use a heat gun or torch to carefully pass over the surface. However, caution is necessary, as excessive heat can cause the resin to cure too quickly or create unwanted effects.
Once you are satisfied with the mixture and have removed any bubbles, it is time to pour the resin into your mold or onto your project surface. Pour slowly and steadily to minimize the introduction of new bubbles. If you are working with a mold, ensure that it is clean and dry before pouring. After pouring, you may want to use a toothpick or a small stick to spread the resin evenly, especially if you are working on a larger surface.
Finally, allow the resin to cure according to the manufacturer’s instructions. This process can take anywhere from several hours to a few days, depending on the type of resin used. During this time, it is crucial to keep the project in a dust-free environment to prevent particles from settling on the surface. Once fully cured, your glitter-infused resin project will be ready to showcase, reflecting the beauty of your meticulous mixing process. By following these steps, you can create stunning pieces that capture the eye and imagination.
Tips for Achieving a Flawless Finish with Glitter and Resin
Mixing glitter with resin can elevate your crafting projects, adding a touch of sparkle and vibrancy that captures the eye. However, achieving a flawless finish requires careful attention to detail and a few essential techniques. To begin with, selecting the right type of resin is crucial. Epoxy resin is often favored for its clarity and durability, making it an ideal choice for projects where the glitter will be prominently displayed. When choosing glitter, consider the size and shape of the particles; fine glitter can create a shimmering effect, while larger flakes can add dimension and texture.
Once you have gathered your materials, it is important to prepare your workspace. A clean, dust-free environment will help prevent unwanted particles from settling in your resin. Additionally, ensure that your mixing tools and containers are free from contaminants, as any foreign substances can compromise the final appearance of your project. Before mixing, it is advisable to read the instructions provided by the resin manufacturer, as different products may have specific requirements regarding mixing ratios and curing times.
When you are ready to mix the resin, start by measuring the components accurately. Precision is key, as an incorrect ratio can lead to issues such as incomplete curing or a cloudy finish. After combining the resin and hardener, stir the mixture thoroughly, ensuring that you scrape the sides and bottom of the container to incorporate all the material. This step is vital, as any unmixed resin can result in a tacky surface or uneven curing.
As you prepare to add glitter, consider the timing of your addition. It is generally recommended to mix the glitter into the resin after it has been thoroughly combined but before it begins to cure. This allows the glitter to disperse evenly throughout the mixture, creating a uniform appearance. When adding glitter, start with a small amount and gradually increase until you achieve the desired level of sparkle. It is important to strike a balance; too much glitter can obscure the clarity of the resin, while too little may not provide the visual impact you seek.
After incorporating the glitter, pour the resin mixture into your mold or onto your project surface. To avoid bubbles, which can detract from the overall finish, pour slowly and from a height. If bubbles do form, you can gently use a heat gun or a torch to pop them, but be cautious not to overheat the resin, as this can lead to discoloration or damage. Once poured, allow the resin to cure undisturbed in a dust-free environment. Curing times can vary, so be sure to follow the manufacturer’s guidelines for optimal results.
After the resin has fully cured, you may notice some imperfections or rough edges. To achieve a flawless finish, consider sanding the surface lightly with fine-grit sandpaper. This step can help smooth out any uneven areas and enhance the overall appearance. Finally, applying a clear topcoat can provide additional protection and shine, ensuring that your glittery masterpiece remains vibrant and beautiful for years to come.
In conclusion, mixing glitter with resin can yield stunning results when executed with care and precision. By selecting the right materials, preparing your workspace, and following best practices for mixing and curing, you can create eye-catching projects that showcase your creativity and craftsmanship. With these tips in mind, you are well on your way to achieving a flawless finish that will impress and inspire.
Q&A
1. **Question:** What type of glitter is best to use with resin?
**Answer:** Fine or ultra-fine glitter is generally best for mixing with resin, as it disperses evenly and creates a smooth finish.
2. **Question:** How much glitter should be added to resin?
**Answer:** A common ratio is about 10% glitter to the total volume of resin, but this can vary based on desired opacity and effect.
3. **Question:** Can you mix different colors of glitter in resin?
**Answer:** Yes, mixing different colors of glitter can create unique effects and depth in the final resin piece.The Ultimate Guide to Mixing Glitter with Resin provides essential techniques and tips for achieving stunning, sparkly results in resin projects. By understanding the types of glitter, proper mixing ratios, and application methods, crafters can enhance their creations while avoiding common pitfalls. Ultimately, this guide empowers users to confidently incorporate glitter into their resin work, resulting in visually captivating and professional-looking pieces.